Personal Progress
Topic #1: College
Well, the fall semester is over. Thank goodness! I’m happy to report that the final grades are in and I am currently carrying a 4.0 GPA thanks to a 96% in Introduction to Environmental Science and a 98% in Environmental Law and Regulations!
I feel pretty good about that…
Environmental Law is pretty dry, but I am an analyst so digging into the nitty-gritty and playing in the weeds of any law is in my wheelhouse. The Intro to Environmental Science class was by far the more interesting of the two classes. I say that because the teacher was a full-on climate change promoter. For example, on numerous occasions, one of the older students (a group which included yours truly), would push back, politely, and ask whether her statements were fact or opinion.
Every time, it seems, she stated that they were scientific facts.
Well, let me tell ya, fact or not, whenever she claimed something that is wholly debatable as fact, the class spent the next 20-30 minutes off the rails debating the merits of her statements. Differing views on the topic at hand were vigorously discussed. No one got angry. No one raised their voice. In fact, it resembled everything a college setting is supposed to be.
Over the course of the semester, many of the new young fresh-faced freshmen would ask us, wizened adult learners, in hushed tones if we were afraid of the teacher docking us points for disagreeing with her. I believe every one of us laughed. One guy said, “Aw, hell kid. These teachers don’t much mess with us old farts. They know that we know what’s what.”
And that’s how the semester went. Sometimes the class was in agreement, sometimes it pushed back. I think, all-in-all, the biggest stumbling block for our professor was her insistence that the ‘science was settled.’
Oddly enough, in a strange coincidence, it was my Environmental Law professor that shared this YouTube video where it is explained why climate data models all seem to have differing start dates. I thought this was a perfect opportunity to share with the Environmental Science professor and the class at large.
Why not poke the bear… I already had my ‘A’.
As far as the spring semester is concerned, I’ll only be taking one class, Industrial/Municipal Pollution (+ lab). This is to accommodate my daughters and their very active spring semesters.
Topic #2: Book Updates
While I have been working full-time and going to school part-time, I have also been reviewing and editing Parts I-III of the Foreign & Domestic series. To date, I have completed and released updated versions (editions) of Part I (now on its 3rd edition) and II (2nd edition) and I am currently in the middle of reviewing Part III. Once the review of Part III (2nd edition) is complete and released, I’ll begin working on getting the series distributed in Audio format.
Can you REALLY Escape the Man?
The professor in my Environmental Laws and Regulations class offered the students the opportunity to perform an extra credit project. The project was fairly loosely defined by the Prof and the only real parameter was that it had to pertain to the class in some way. Easy enough.
To me, the offering of extra credit in a college class is like being offered a matching contribution in my stock purchase plan. To not take them up on the offer of free points, or money, would be ludicrous!
It took me a while to get my arms around my concept because I tend to think REALLY big picture, but in the end, I narrowed my focus to the following premise:
Could you live off-grid and truly remove ‘The Man’ from your life?
Trying to answer this question took me down several rabbit holes, to say the least.
Say you buy some rural land and want to have your own little homestead. What will you need to make life somewhat tolerable? Well, to me, I went with water and electricity (in some form). Here’s the final slide where I finished defining all of the concepts a person might consider implementing on their homestead:

A big concept in the environmental space is the ‘Permit to Install’ (PTI) and ‘Permit to Install and Operate’ (PTIO). So in an effort to tie the concepts that I’d just outlined back to the curriculum, I asked the students if any of the proposed installs would require a PTI or PTIO.
Oh, and incidentally, if you are thinking about incorporating a wind turbine, the Ohio Anemometer Loan Program (ALP) allows qualified applicants to borrow all necessary equipment to conduct a wind study, including a temporary meteorological tower, data logger, and instrumentation. Green Energy Ohio will provide study services, such as site inspection, equipment installation, data validation, and program management at no cost.
Now, in an effort to answer the PTI/PTIO question for the presentation, I called down to Vinton County, Ohio and started asking questions. The selection of Vinton County was not by happenstance either. It happens to be where the bulk of the Foreign and Domestic book series takes place. Incidentally, I also called the Ohio EPA (OEPA) and the United States Army Corps of Engineers (USACE). Vinton County had some interesting responses.

In a nutshell. if I am building anything outside of the city limits of McArthur, Ohio, I can pretty much do whatever I want with the exception of the well and the septic systems. Those were the only two items on my list where the county required a PTI. However, they said that, while they had no real jurisdiction over these, I would definitely need to call either OEPA or the USACE for the hydro-electric, fuel storage, and the wetland portion of the pond/wetland concept.
Damn! I was so close!

When I called the USACE and explained the hydro-electric project, they immediately sat up. When they realized it was a tiny turbine I was proposing to generate some electricity for a shop or outbuilding, they sat back down. Once they fully understood, they said all they’d really care about is the splash pad where the discharged water re-entered the surface water. They would want to see the erosion controls measure implemented.
That’s it? Sweet.
Here’s the slide explaining all of that.

Fuel Storage is highly regulated in the state of Ohio, just like anywhere else in the states I’d imagine. If you have to have fuel on-site, you’ll choose between either underground fuel storage (UST) or above ground fuel storage (AST). From a regulatory standpoint, choose UST. Apparently, the OEPA and USEPA get real jumpy with AST due to the heightened risk of massive explosions. Therefore, it is regulated more heavily than UST. But… there’s always a but… you can remove the OEPA, Fire Marshall, and a whole host of other regulations if you keep the containers under the minimum threshold of 1,100 gallons.

You’ll definitely need a PTI for the fuel storage concept.
The last concept, which I also spoke to both the OEPA and the USACE about, was the pond/wetland idea. Both of these regulatory bodies got real curious about my ideas for ponds and wetlands. I couldn’t help but think that while I was talking to them I was playing a really annoying game of ‘what-if’ with them as if I were a toddler interacting with their parents.

Once I got them nailed down on my ideas, the said some interesting things. First, they’d want to see the splash pad for the overflow discharge pipe. Second, the minute any acreage is designated as a ‘wetland’, regardless of whether it was there beforehand or I built it from scratch, I would have to, at a minimum, have the wetland restriction deeded into my property.

I personally concluded that I would avoid the incorporation of a designated wetland. That’s a can of worms no one needs on their property.

In the end, though, all of the government agencies I contacted basically said the same thing. If you let us know what you’re planning beforehand, we can tell how to avoid on-going governance from a regulating body.
Just like extra credit, that’s advice I’d willingly take.
20 AMP Breaker and Outlet Installation
Our house was built shortly after WWII. We did an extensive remodel in 2016/2017 complete with an oversized gas meter to handle the future install of the whole house generator. The electrical panel was also replaced and enlarged. What wasn’t addressed was the single 15 AMP outlet in the garage. We have so many Christmas lights the extension cord melted outlets. To say this was a fire hazard would be an understatement.
Now, I’m not one for electricity. Framing, trim work, plumbing, sheetrock, shingles, landscaping… pretty much anything that won’t freaking kill you, I’m more than capable of handling. Electricity? Hate it! Won’t touch it!
Until now. Now, I was motivated to conquer my fears.
After spending several evenings scoping things out in the electrical panel, surveying possible routes for the wire, and more than a few trips to Home Depot to review materials and prices, I was feeling confident.
False bravado? Perhaps.
After watching some videos on YouTube, I was definitely chomping at the bit. I mean, the video below made it look so easy.
Eventually, I purchased the following:
50’ of 12/3 wire
20 AMP breaker*
20 AMP outlet
Post-construction box
Outlet plate
3/4” Wire Staples
* The 20 AMP breaker was a double breaker and 1 pole.
I already have a sheetrock saw for cutting the hole in the wall in preparation for the post-construction box and to fish the wire. I also already owned a wall fish (aka fish tape). I did purchase an extra-long drill bit in case I encountered something a shorter drill bit couldn’t reach. In the end, I didn’t need it so it was returned.
The installation went relatively flawless. Running wire by yourself sucks by the way. You should know that going into a project like this.
Basically, I just did what the video showed for the wiring of the outlet and the work in the panel. For the nitty-gritty detail-oriented people out there, I did the following:
1. Located my outlet placement in the garage and cut a hole for the post-construction outlet box.
2. Taped the wire to the fish and shoved it up the wall until I could grab it through the outlet hole I cut in the garage wall.
3. Once the wire was through the rough outlet hole in the wall, I removed the tape and sent the fish back into the basement, opened up one of the openings on the post-construction box, pulled enough wiring through for the outlet itself, then installed the post-construction outlet box.
4. I removed the circuit bridge between the two outlets just like they showed in the video then I wired the outlet and installed it into the box. I even put the cover plate on.
5. Returning to the basement, I used the 3/4” wire staples and placed the wire along the floor joists and replaced any insulation I’d removed.
6. I then fished the wire over to the panel and cut off the excess length.
Now is about the time I took a few minutes to psyche myself up to play in the panel… because remember… I hate electricity.
7. I turned off the main breaker and that’s when all hell broke loose.
According to code, when we did the remodel, all of the smoke alarms were hard-wired into the panel. When I turned off the main power supply, every single one of them went off in unison and started screaming, “FIRE,” after each alarm blast. Nothing like a little auditory annoyance when you’re monkeying around in the electrical panel. I’ll have to have someone come and look at that because if we lose power in a storm, I’ll literally have to leave my house due to the incessant alarm.
8. I quickly removed the 6 screws holding the panel face on and located an empty slot for my double 20 AMP breaker.
9. Then I shoved the wire into the panel from above just as the electricians had done previously. It was actually very tidy in there.
10. Recognizing that all of the ground wires went to the left bus bar and the neutral wires went to the right bus bar, I followed suit and wired each of these in place accordingly.
11. I then installed the ‘red’ hot wire into the 20 AMP breaker followed by the ‘black’ hot wire.
12. Satisfied that everything was secure, I turned the main power back on.
Ahhhh! Silence!
13. I checked for any shorting, smoke, and fire and there wasn’t any.
14. I went to the garage and plugged in my 1500 watt portable space heater and let it run for a few minutes. The breaker didn’t get tripped like it used to do on the 15 AMP line.
15. I re-installed the panel cover, cleaned up my mess, then went upstairs and had a celebratory beer… reveling in my mastery of electricity!
Basil Seed Harvesting
This year I did something different and grew three varieties of basil. I added Cinnamon and Greek Basil to my usual haul of Genovese (sweet) Basil. I thought it would be fun to try these others since I had the room in the garden this year. As an afterthought, I asked a friend, who happens to be Greek, if he wanted some seeds for him and his family. He’s been supplying me with large cans of first cold-pressed authentic Greek olive oil so I wanted to say thanks and return the favor somehow.


I generally don’t share a lot about my location online for safety reasons. That being said, there are online followers that I know personally as we live in the same community so they’ll probably be the only ones that’ll understand when I use the term ‘the Greeks’. In fact, the Greeks refer to themselves by this term collectively.
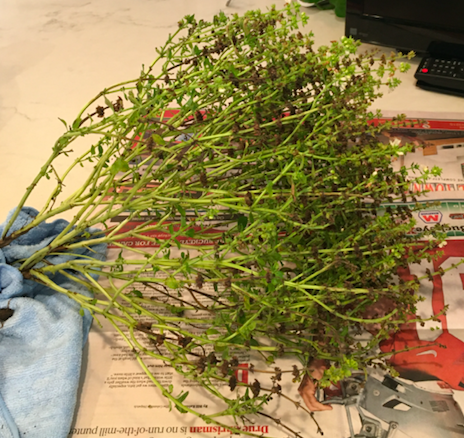
Long story short, my Greek friend enthusiastically accepted the offer but wondered if I could harvest some extra for the Greeks. What I didn’t realize was that so many of the Greeks would be interested in the seeds. His request didn’t offend me in the least though because, as it turns out, I already knew a lot of the Greeks (it’s a small town). Apparently, anything that reconnects them to ‘the old country’ is always welcomed and accepted. Now that you have the requisite background for this post, here I am harvesting an ass load of Greek Basil seeds. It’s actually quite easy, albeit tedious.
If you grow basil, then you know that every variety will shoot out these flower stalks. The bees love them! The flowers, usually four, will form a ring around the stalk. Once they’ve flowered, and the petals die, the flower stalk will grow and repeat the process of forming new flowers. What’s left behind, after the flowers wither, is something that closely resembles a dried husk of sorts. Inside the husk is your treasure, the seed.
When I got the request for seeds, I could have harvested them throughout the growing season. When I realized I’d be supplying every Greek in town, I decided to wait until the growing season was over and just harvest the whole plant.

As a side note, Greek Basil is different from Cinnamon and Genovese in that it is much shorter and it tends to be more shrub like, or rounded. This makes them easy to identify in the garden. Here’s a close up of the spent flower (husk).

The trick, or tedious part, is getting the seeds out. There is no easy way to do it. What I’ve been doing is snipping off a stalk from the harvested plant. From there, I’ll pluck one of the spent flower rings and slowly roll it between my fingers over white paper. I was using the white countertop but the wife saw that and put an end to my shenanigans. Basically, I created a pile of chaff. The seeds lay in the pile of semi-pulverized debris. They are easy to spot as they look like little fleas.

Once I separate the seeds from the chaff, I place the seeds in this white porcelain dish. I’ve been working on this off and on for a week or so. Ten or fifteen minutes here or there mostly. This is what I’ve got so far.

All in all, I think I need about 200 seeds to fulfill the Greeks order plus have some left for myself.
Seed harvesting can be time consuming and can be done on just about anything. Presuming of course that you are starting with an organic non-GMO plant, seed harvesting from your own garden ensures that you’re getting authentic seed and not some bastardized GMO nonsense.
DIY Saves Serious Pesos
Now that the book series is complete, I’ve had more free time to do stuff around the house. A project we put off for far too long was the repair and/or replacement of our driveway apron. For those of you not in the know, the apron is technically part of the driveway and it is what connects the driveway proper to the street. Our lovely city, the city to which we pay such exorbitant property taxes toward in order for our kids to go to a public ‘private’ school, has decreed that driveway aprons and sidewalks are the homeowner’s responsibility to repair. That is unless of course the city is working in their right of way and trashes your apron or sidewalk. In which case, the city is responsible.
But I digress…
Out of sheer morbid curiosity, we got some estimates for a professional to just replace the entire thing. The most memorable estimate was ~ $4000!! That was absolutely ridiculous in our eyes.
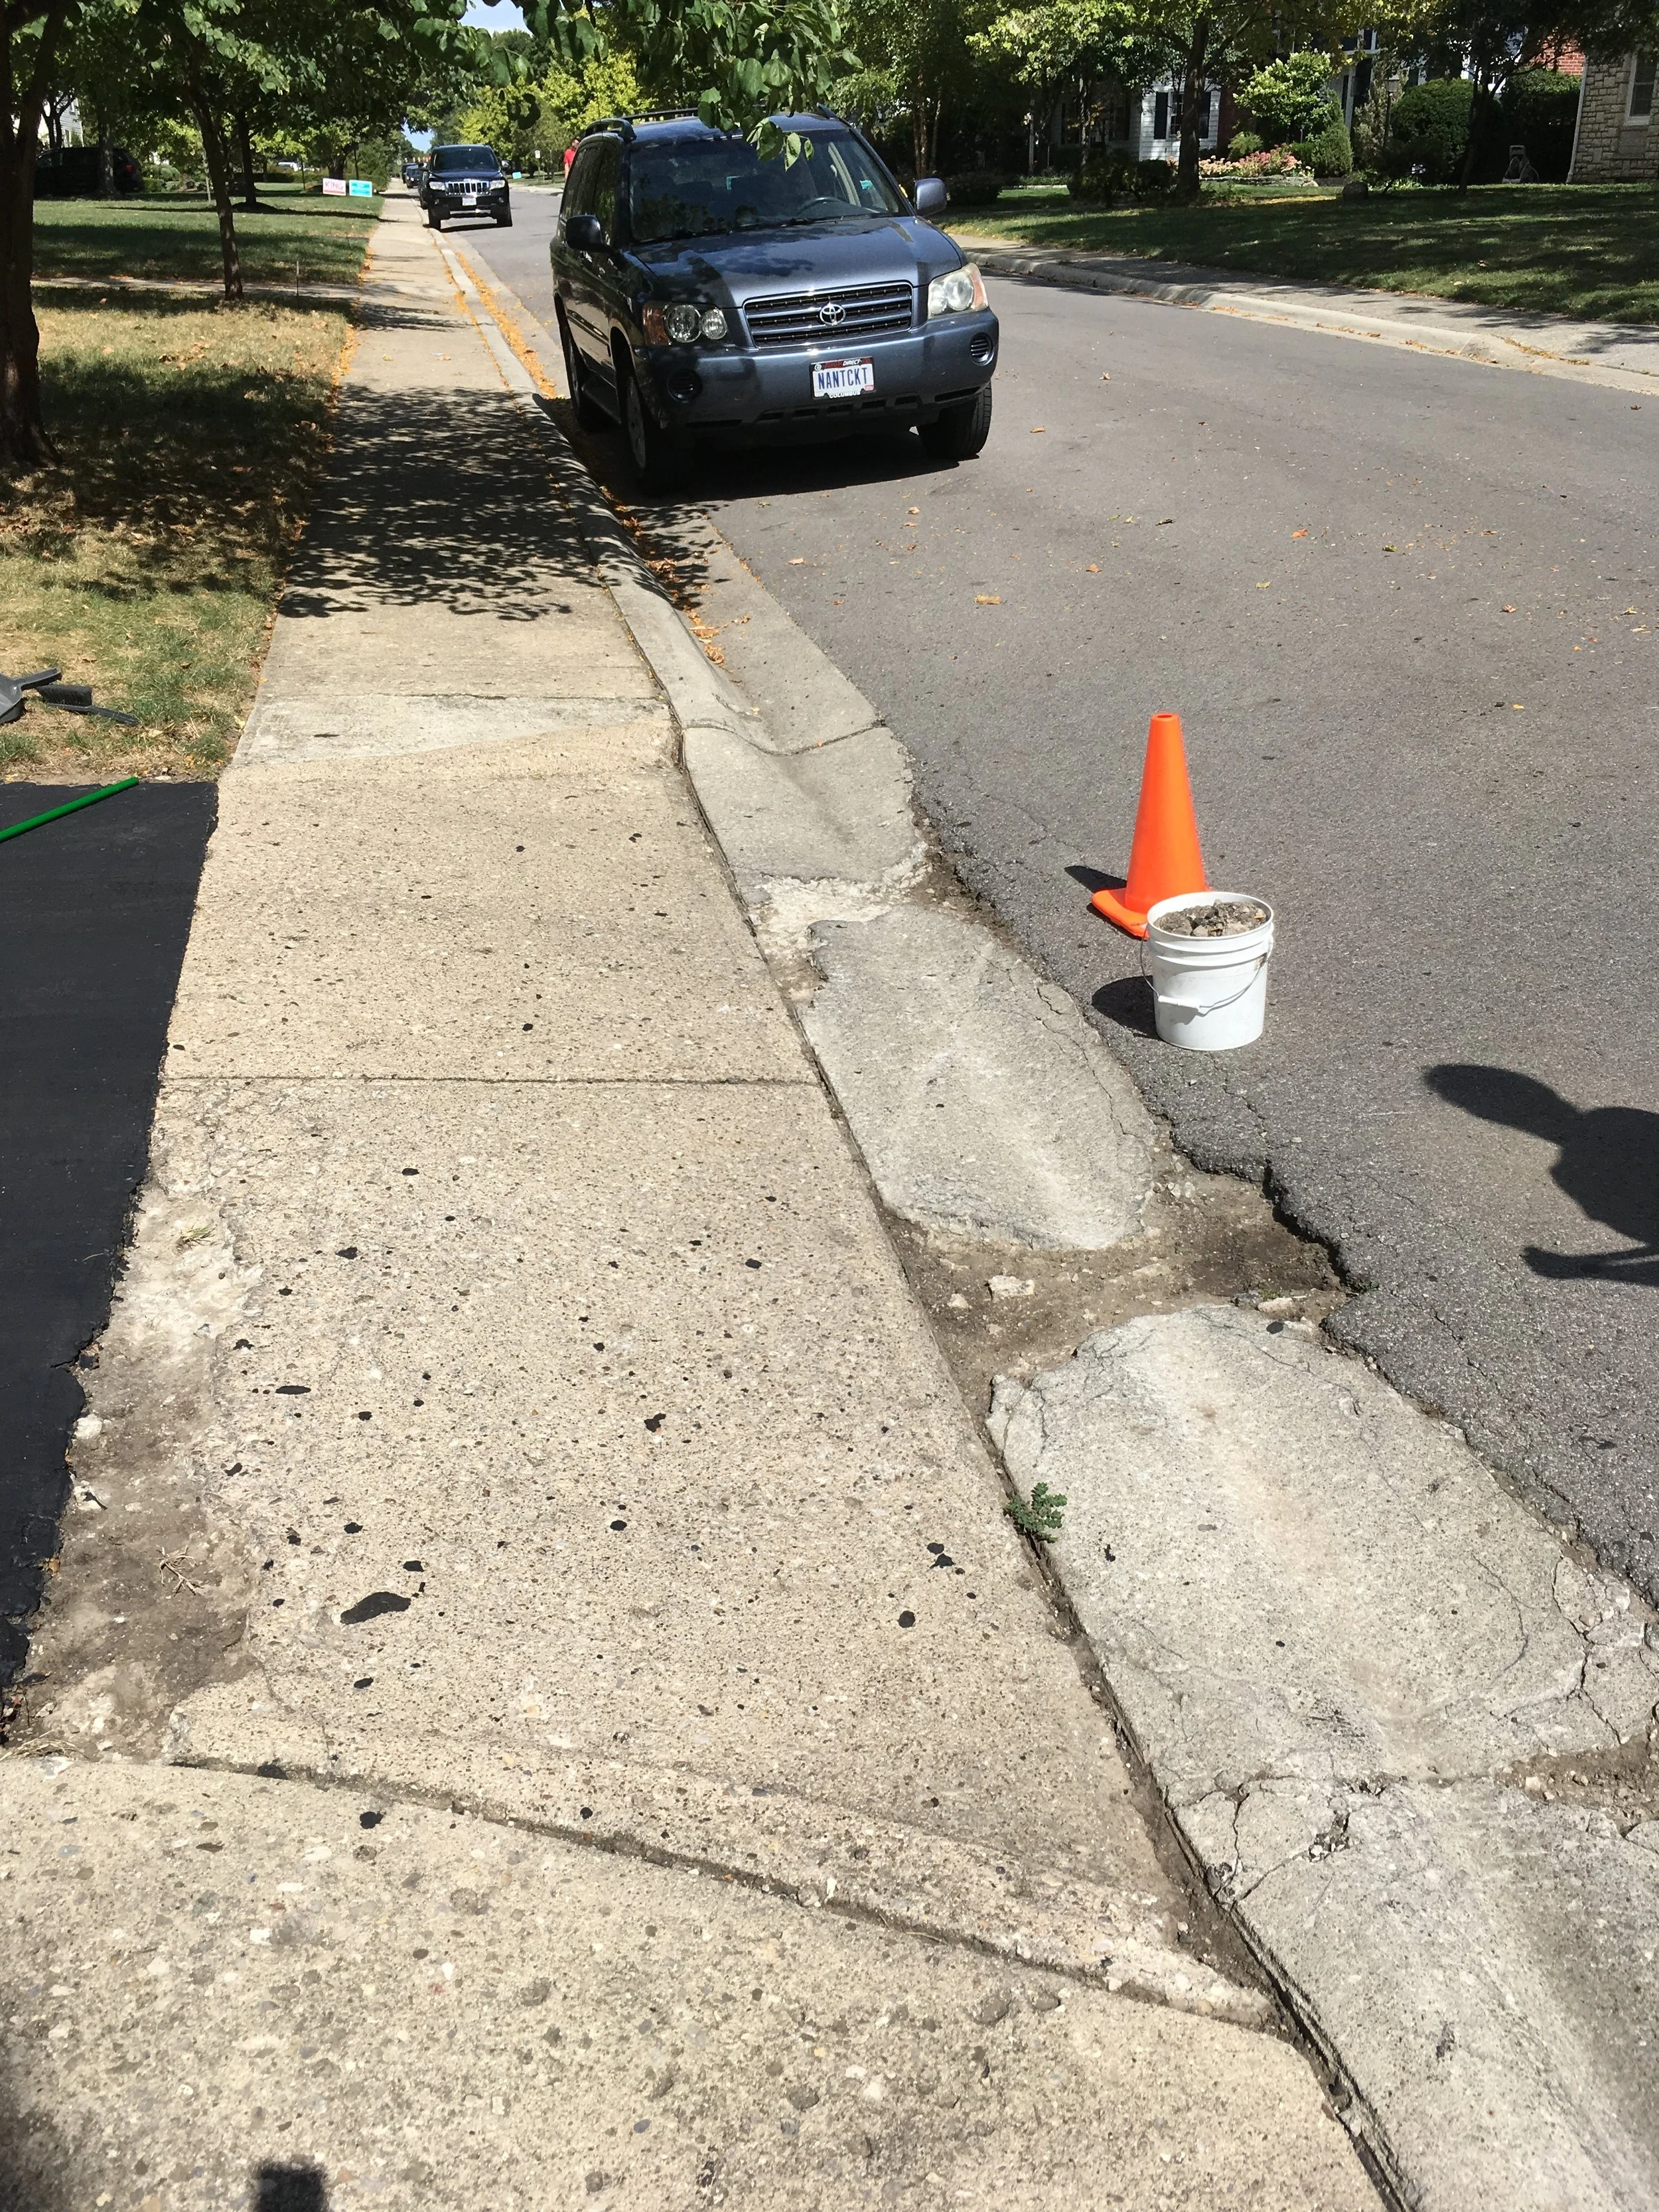
Balking at that BS, we then began viewing the job as a repair job. Could we repair the apron instead of replacing it? Well, according to YouTube, it seemed pretty straight forward. Besides, in this instance, you can’t really screw up concrete. Some of these cracks, holes, and crevices were pretty substantial.


The above images were what we were dealing with. Our neighbor across the street had repaired his and I’m a pretty handy guy. So, we figured, why not.
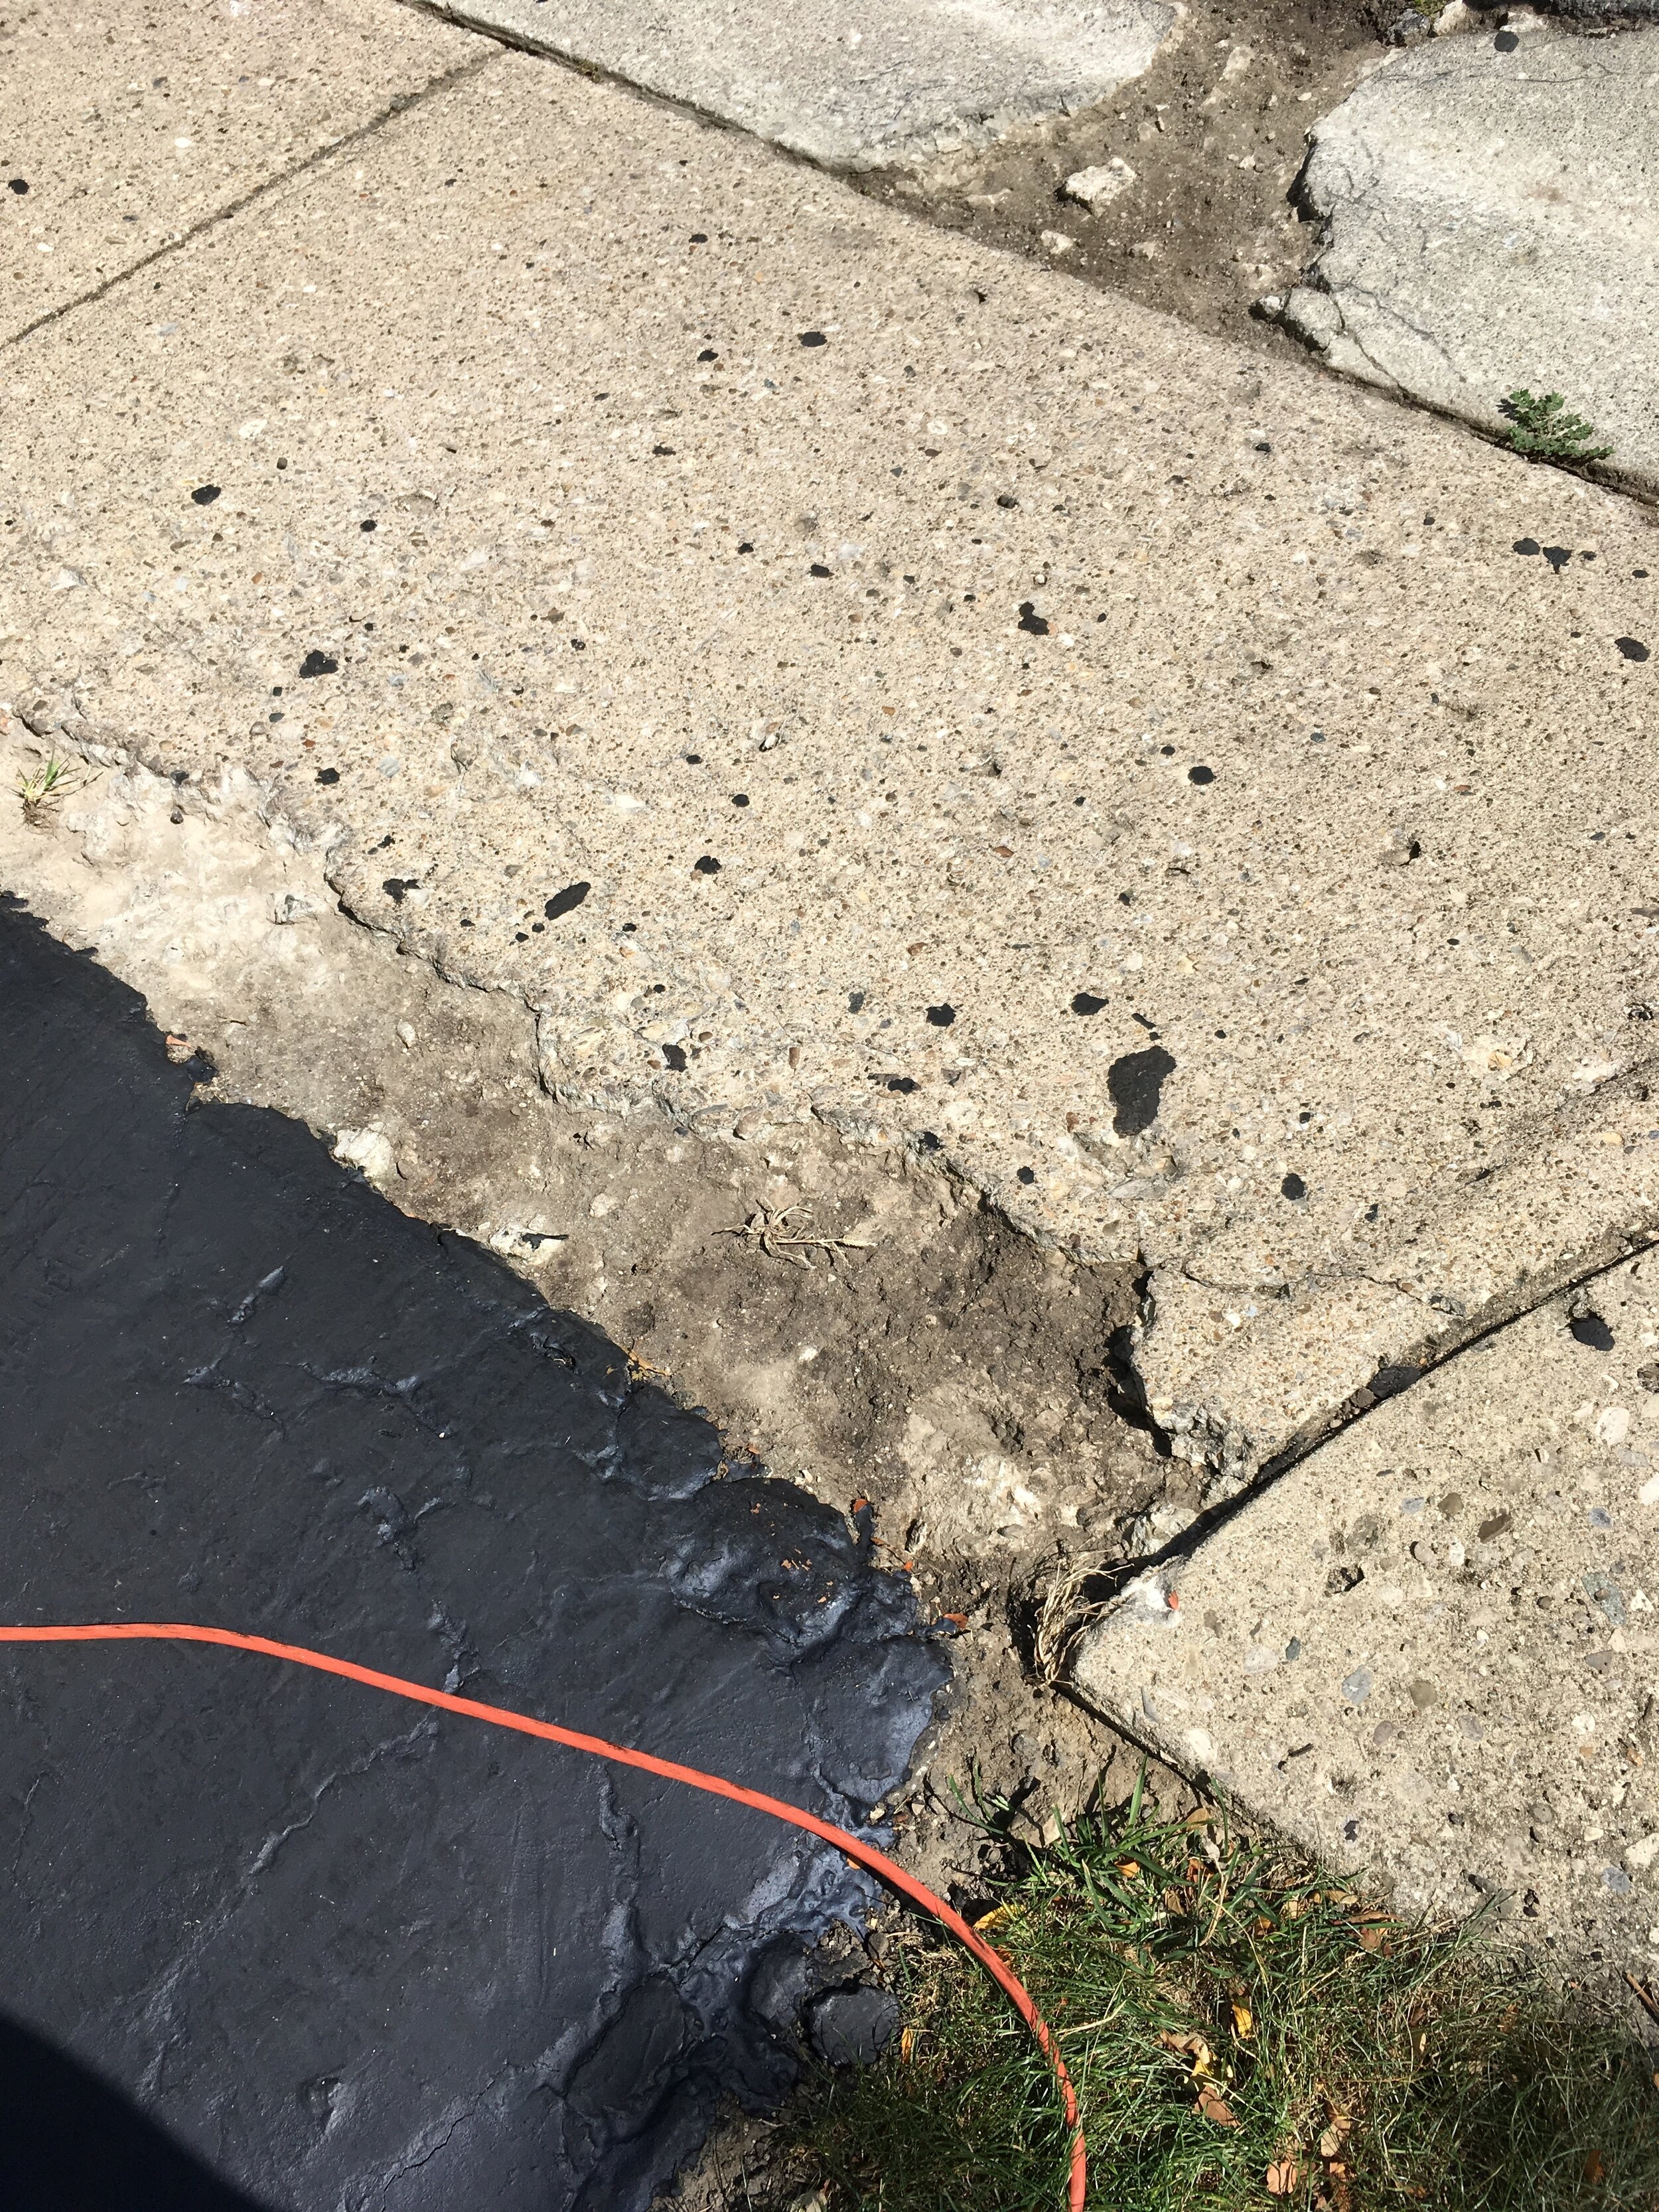
With the task in hand, we began the process of cleaning out each area to be addressed. I hit it with the blower, the hose, and a broom. While that was drying, I went to the hardware store and literally spent $15 on two 60# bags of Quikrete and one bottle of the bonding agent. With the wife looking on in a supervisory capacity, I mixed small batches of concrete and dumped them in each hole until full. Then I stopped her shovel leaning and had her spread the concrete throughout. with a trowel. I even taught her how to float the ‘concrete’. Here’s what it ended up looking like:


So, there you have it. We literally saved ourselves $3985 by doing a little research, having a can-do attitude, losing the fear of failure, and just working the problem until we found a solution. Don’t be so quick to cut a check and let someone else solve your problem. See if you can’t fix or resolve the issue for less money by sacrificing just a little time and some elbow grease.
Preparing for Winter
The folks over at the Farmer’s Almanac recently published their predictions for this winter and the majority of spring/summer 2020. Based on their time-tested analysis, the bulk of us here in the Midwest can expect a harsh winter. The wife and I were actually kinda giddy about the prediction. The topic of winter prep came up recently with a friend of mine too and… well; frankly, I’m actually concerned for him and his family.
As we discussed the Farmer’s Almanac over lunch, I asked my friend if he was getting ready for winter and the inevitable power outages. I asked him about his winter preparations because I knew that he and his family had recently purchased a new home within the last year. The first question I asked was whether he had a generator (whole house or portable).
He scoffed, guffawed, and chuckled before replying, “Wife won’t even entertain the option.”
Knowing that he and his family live in a more rural setting (meaning small town and well outside of the major city limits that I live in), his reaction made me curious.
Ok, I thought. Generators can get pricey and they are a one-income family with a pre-school aged child. This could explain the wife’s reaction. From there I switched gears and asked about his firewood situation.
“Don’t have any,” was his reply. “And I’m not entirely sure the fireplace even works.”
Oh, boy.
As a suggestion, and to keep his costs down, I recommended that he review his home purchase paperwork, specifically the home inspection pages. Somewhere in there, it should have noted the condition of the chimney and flue. He may be able to avoid the cleaning costs if it’s denoted in his paperwork as not requiring any servicing.
Not wanting to see my friend and his family suffer needlessly, I asked, “Do you have a wood stove, or wood pellet stove, or some sort of kerosene heater?”
“Nope, nope, and nope,” came his reply.
“Uh, so what are going to do when the power goes out for days?”
“Freeze, I guess,” was his response.
He was dead serious.
He went on to explain that their previous house had a wood pellet stove to supplement their electric furnace and keep bills down. However, since it was a rental home, it wasn’t theirs so they couldn’t take it with them when they moved. I also learned that at some point in their marriage they’d gone without power for several days. He made of point of mentioning that, at that point in their lives, they had a gas stove/range and a gas water heater, coupled with two golden retrievers and a loaned kerosene heater. They made do but still froze their butts off.
That’s when I reminded him that they had previously done this without a child to care for.
I think I saw a little light bulb go off above his head at this comment.
Actually, I think it was flashing red and lighting up a big sign that said, “Oh shit!”
It went downhill from there.
Here’s an excerpt from my yet unpublished non-fiction piece Preparing to Prepare. It lends itself to my friend’s predicament and our conversation:
**********
When people hear the words ‘self-sufficiency’ and ‘preparedness’ together in the same sentence, they typically conjure up images of a reclusive, grungy, bearded prepper living off-grid in the woods in a makeshift bunker. While, I find this juxtaposition hilarious, I also happen to know that those terms get a bad rap. What this guide will show you is that anyone and everyone is, in a general sense, preparing for something. The difference is that we don’t ascribe those terms to say:
Suzy Homemaker who purchased some extra cases of water for her family because the dog days of summer are approaching.
Johnny Backwater who purchased two dozen sheets of plywood so he could board up his beach house windows when the hurricanes start spinning in the Atlantic.
Grandma Betsy who grew and canned produce from the Victory Garden she just couldn’t give up seventy-five years ago.
Uncle Frank who purchased and filled extra cans of gas for his generator so he could keep the furnace running when winter ice arrives and knocks out power.
When we see examples like these, we say they were smart to be prepared in a good way, like a Boy Scout, not derogatorily. The intent of this guide is to showcase specific examples and scenarios and provide real-world solutions and suggestions so you and your family can weather just about anything.
Now, to get things started, let me ask a simple, direct question:
What do you think you need to prepare for?
This is an extremely important question and you must ask yourself this. Before you answer it though, I want you to think long and hard about it before you answer. Do not make a single purchase or decision until you have this answer. The reason I say this, and stress it the way I have, is that the answer will drive your decision making, thought processes, and spending habits.
Let me ask my initial question differently and associate it to a duration.
Are you preparing for a minor disruption of services (1-week max)?
These types of events are usually your weather and natural phenomenon related events. Things like hurricanes, tornadoes, earthquakes, flooding, wildfires, mudslides, ice storms, and blizzards. If this is the case, you are likely to remain in your primary residence, also known as ‘sheltering in place’. That is, assuming the home hasn’t been so severely damaged to become uninhabitable.
**********
For the purposes of this post, I’ll skip over the everyday preparedness questions you should know the answers to already. These are questions like:
Do you know the location of your important documents?
Do you have a workplace, school, home, and community evacuation plan?
Do you have a designated meeting location in case there is an emergency?
Let’s focus on winter and prolonged periods without electricity.
What do you think of when you think of winter? I’m not talking about hot chocolate, sledding, or chestnuts roasting on an open fire. I’m talking about winter planning when you look beyond the Hallmark movie. Winter is cold and wet. Winter is windy and slippery. Winter has sleet, slush, snow, ice, and snow rollers. If you don’t plan accordingly, winter, and it’s often times brutal cold, can kill you. My suggestion is that you begin reviewing what you do have now, several months before winter. Take advantage of the fact that supplies are in abundance and the weather is nice to get your proverbial house in order. Don’t wait until it looks like this out there…
FEMA says you should have a 3-day supply of food and water on hand at all times at a minimum. I say FEMA grossly under estimates their capacity for aid and charity. I believe it is incumbent on the individuals to plan for their own needs and the needs of their family and resist the urge to factor government assistance into your planning. To this end, I believe you should have two-week’s worth of the following for everyone living in your home, pets included:
Food
Your food stocks should be of the freeze-dried, MRE, or canned variety.
Do not count refrigerated items in your planning.
Save whatever is in the fridge by placing it in a cooler in the garage or shady spot outside if it’s cold enough.
Water
Your water can be bottled since the duration is limited in this scenario.
Longer-term durations might require water purification tablets.
Consider purchasing a Water Bob for use in the bathtub to capture any water in your pipes and water heater.
Fuel
For a vehicle to go 50-100 miles (one-way, double for round-trip) to get supplies
For the portable generator (assuming you have one)
For the house generator (e.g. Generac, assuming you have one that is not on a city feed)
For cooking meals and boiling water (propane, white, or charcoal - assuming you don’t have a natural gas burning stove/hot water heater)
For the space heater (typically kerosene)
For the fireplace
Medications
Consumable Supplies (batteries, candles, toilet paper, feminine supplies, etc.)
For the whole house generator on the city feed, you might want to have a back-up plan for that piece of equipment. The reason being that if the city is without power, the pumps won’t maintain pressure in the system. When this happens, you won’t have any more natural gas flowing to your house and your whole house generator.
Now, depending on your needs, if you flesh out the last item on the list, Consumable Supplies, you might have a list that looks something like:
Batteries (varying sizes)
Candles (long burning)
Toilet Paper
Feminine supplies
Spare toothbrushes/toothpaste
Soap and shampoo
Deodorant
Dishwashing soap
Laundry detergent
A method for washing/drying clothes
Pots/pans
Paper plates, cups
Plastic cutlery
Matches/tinder
Spare heavy blankets/sleeping bags
Granted, food and water are consumable products too, but I’ve made those separate line item categories for the simple fact that you need those two items to live and survive. Anything outside of food, water, and heat is, more or less in the strictest sense of the term, a comfort item. I suggest the inclusion of paper plates and cups because they can be burned after the fact and you won’t need to waste precious water resources washing them. It’s a ‘two birds, one stone’ kind of thing. Washing and dying clothes is a bit of an advanced concept but it was worth including for anyone wanting to go full bore.
As with anything I provide to the public, use the lists and customize them to fit your needs.
Let’s return to my friend and his predicament because I did have some good news for him over the course of my impromptu assessment.
As far as heat was concerned, he failed miserably. He knows it and I didn’t see the need in beating that horse after I’d already shot it. That being said, I told him that I have a spare firewood hoop that I’m donating to the cause. I also suggested he start paying attention to various online resources (Craig’s List, Facebook Groups, Let Go app) for people advertising free firewood. Once we returned to the office, I sent him some links for firewood racks and covers and described to him how to build his own with scrap wood if he didn’t want to drop $50 on a rack on Amazon.
When it came to food stocks, he did pretty well. He estimated that they had at least a weeks’ worth of food on hand. I suggested that he either build or obtain some shelving units and place them in his unfinished basement. For an additional $5 or less on their grocery bill, I said they should purchase an extra can or two of this and that and just stick it in the basement. Within two months or so, their family should have a healthy reserve to get them to, or beyond, the two-week threshold I recommend.
Whenever anyone is just starting out with their preparedness, I always tell them to start small by simply assessing their needs based on the answer to the question: What do you think you need to prepare for. When you have that answer, you can:
Make a list of everything you’ll need to be prepared for that.
Assess what you do have and cross those items off your list.
Set a budget.
Prioritize what you lack to achieve your goal.
Acquire the missing items over time until you have everything you need.
It’s that simple.

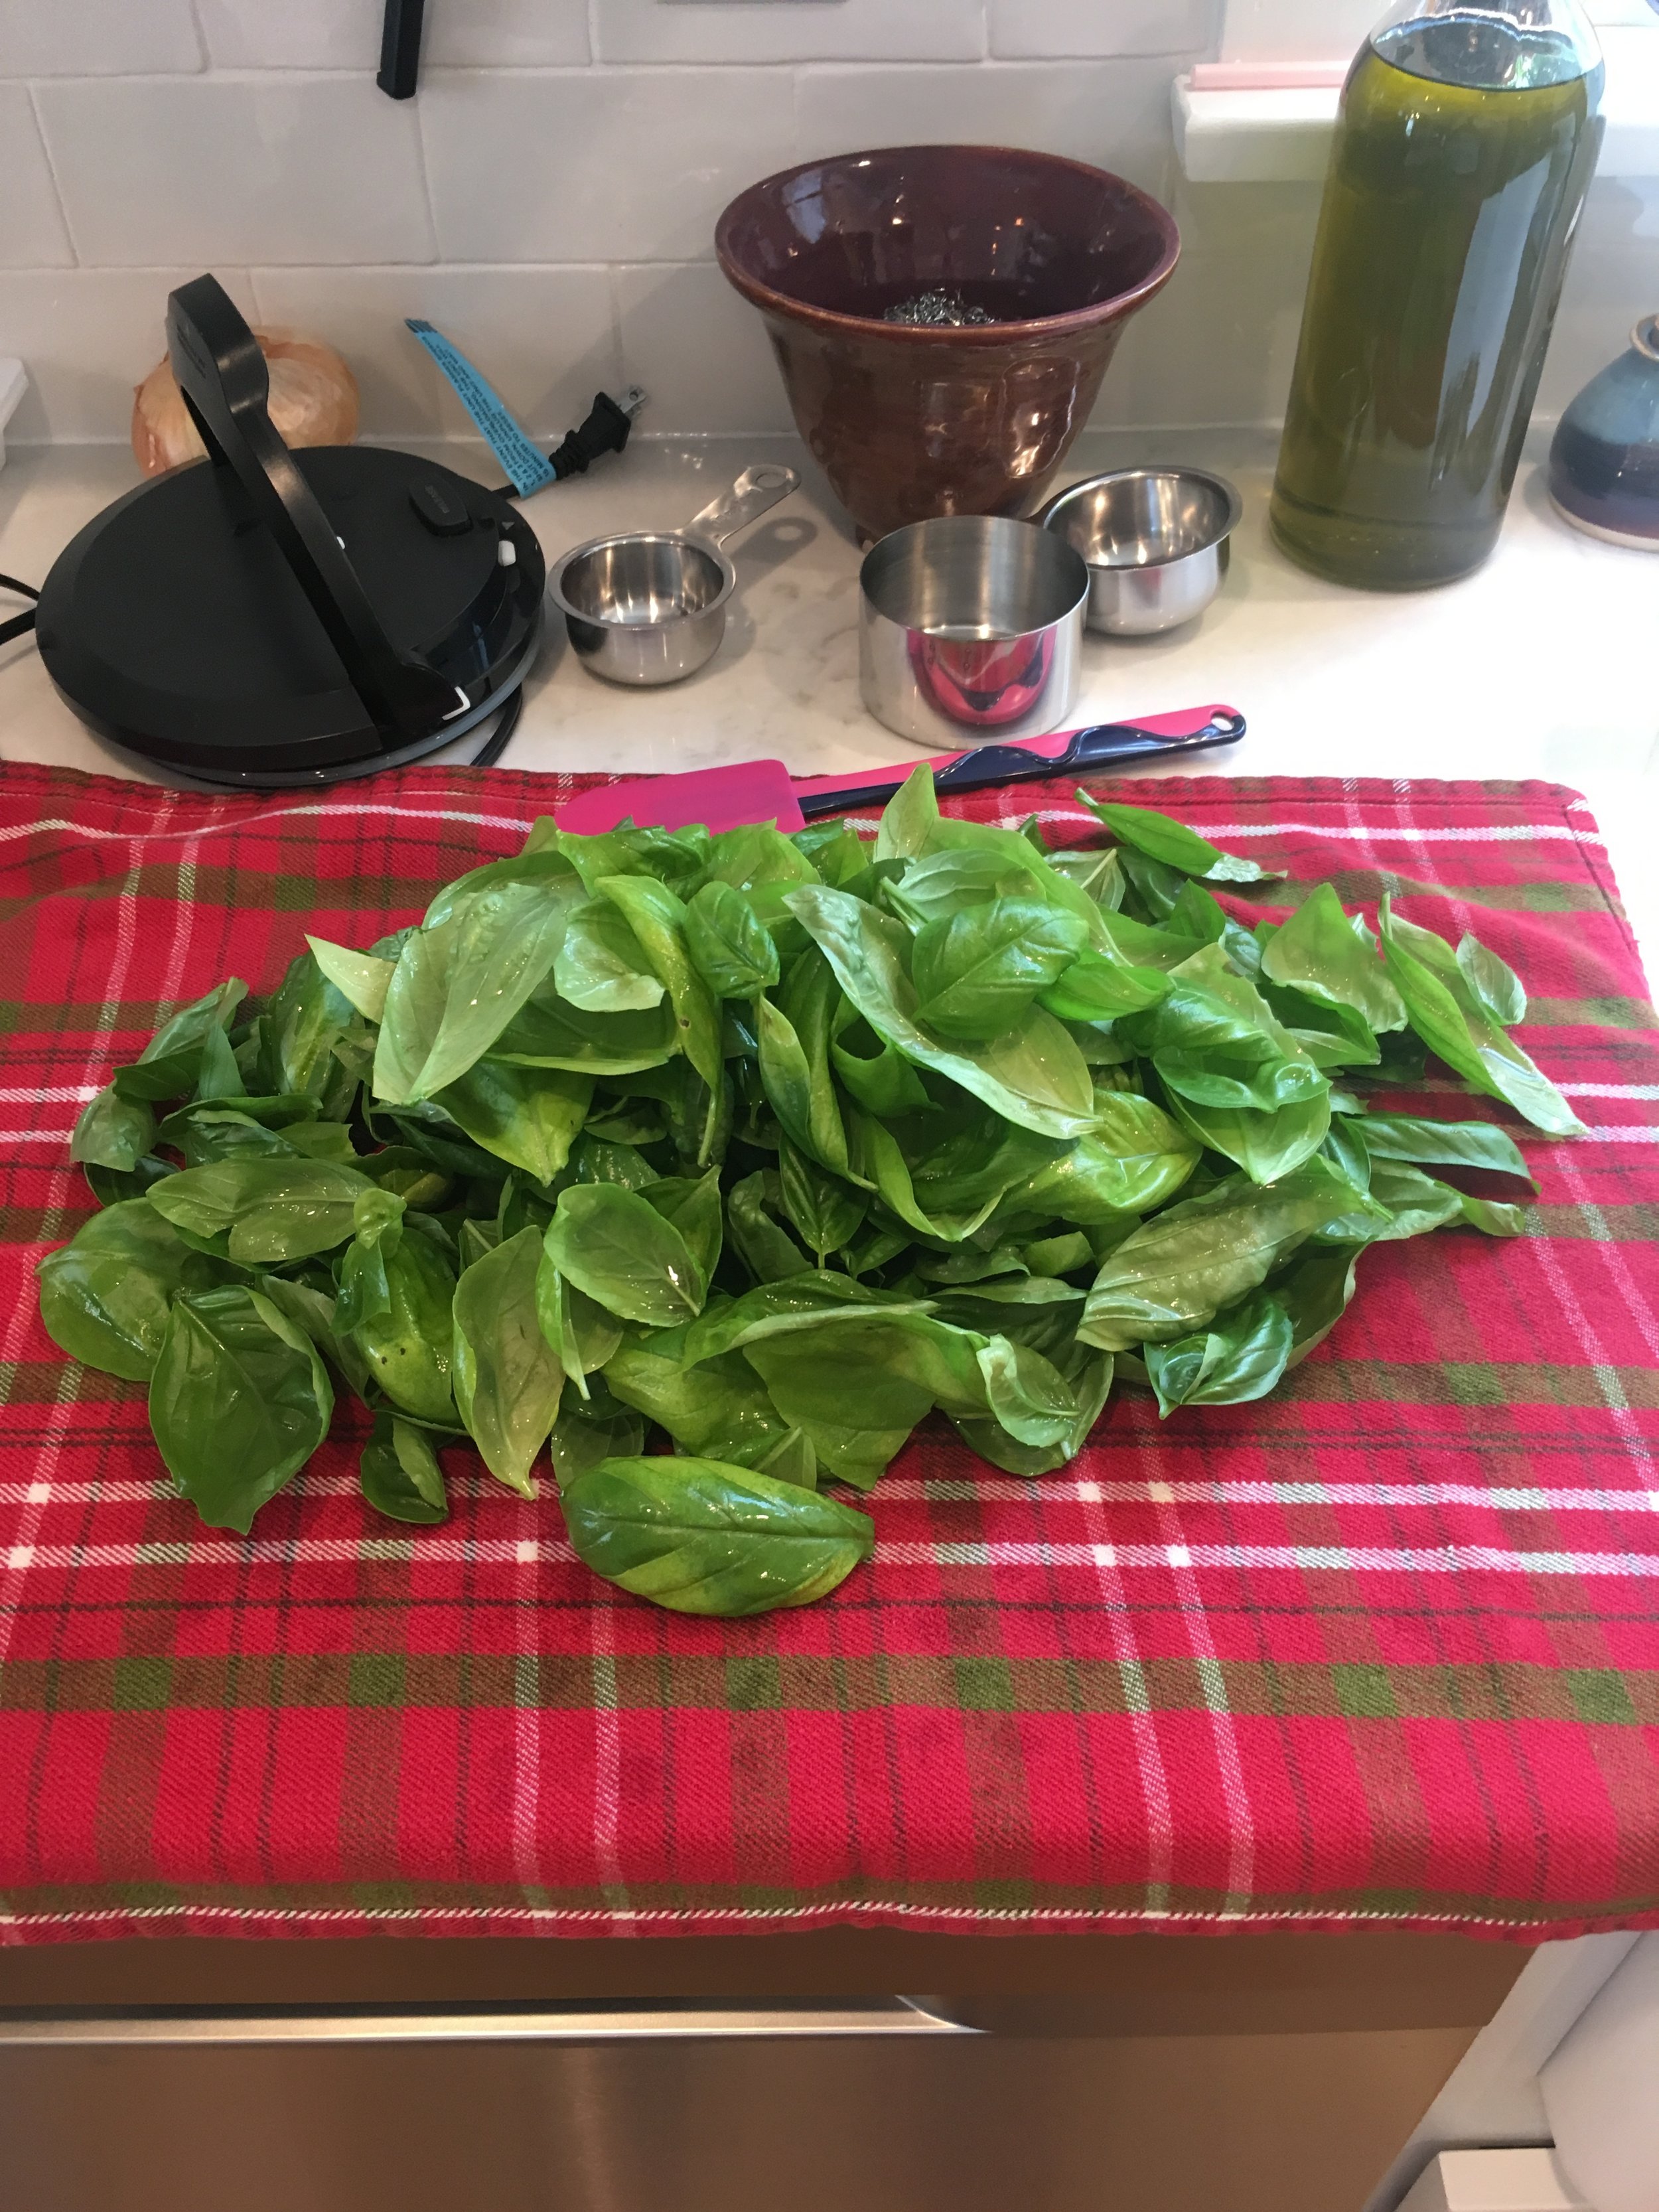
Basil Pesto Time
If you’ve been following my blog (or it’s precursor on my FB author page), you know that I have been working on, in, and with gardens for some years now. One of the plants that we tend to grow a lot of is basil. Over the last several weeks we’ve been harvesting these plants and making large quantities of basil pesto. It’s not all that labor intensive and if your store it right, you’ll have this delicious dish to enjoy all winter long.
If there is a nut allergy you need to steer clear of, just don’t add them.
Here’s what we do…
Ingredients:
2 C Fresh Basil Leaves, packed
1/2 C Grated Parmesan (or Romano)
1/2 C Extra Virgin Olive Oil
1/3 C Pine Nuts (can substitute walnuts, almonds, hazelnuts, or pecans)
3 Cloves Garlic
1/4 t Salt, add more to taste
1/8 t Pepper, add more to taste
Do yourself a favor and do NOT try to do more than a double recipe. The consistency is tough to regulate once you go that big.
Directions:
Harvest basil and wash each leaf individually, pat dry.

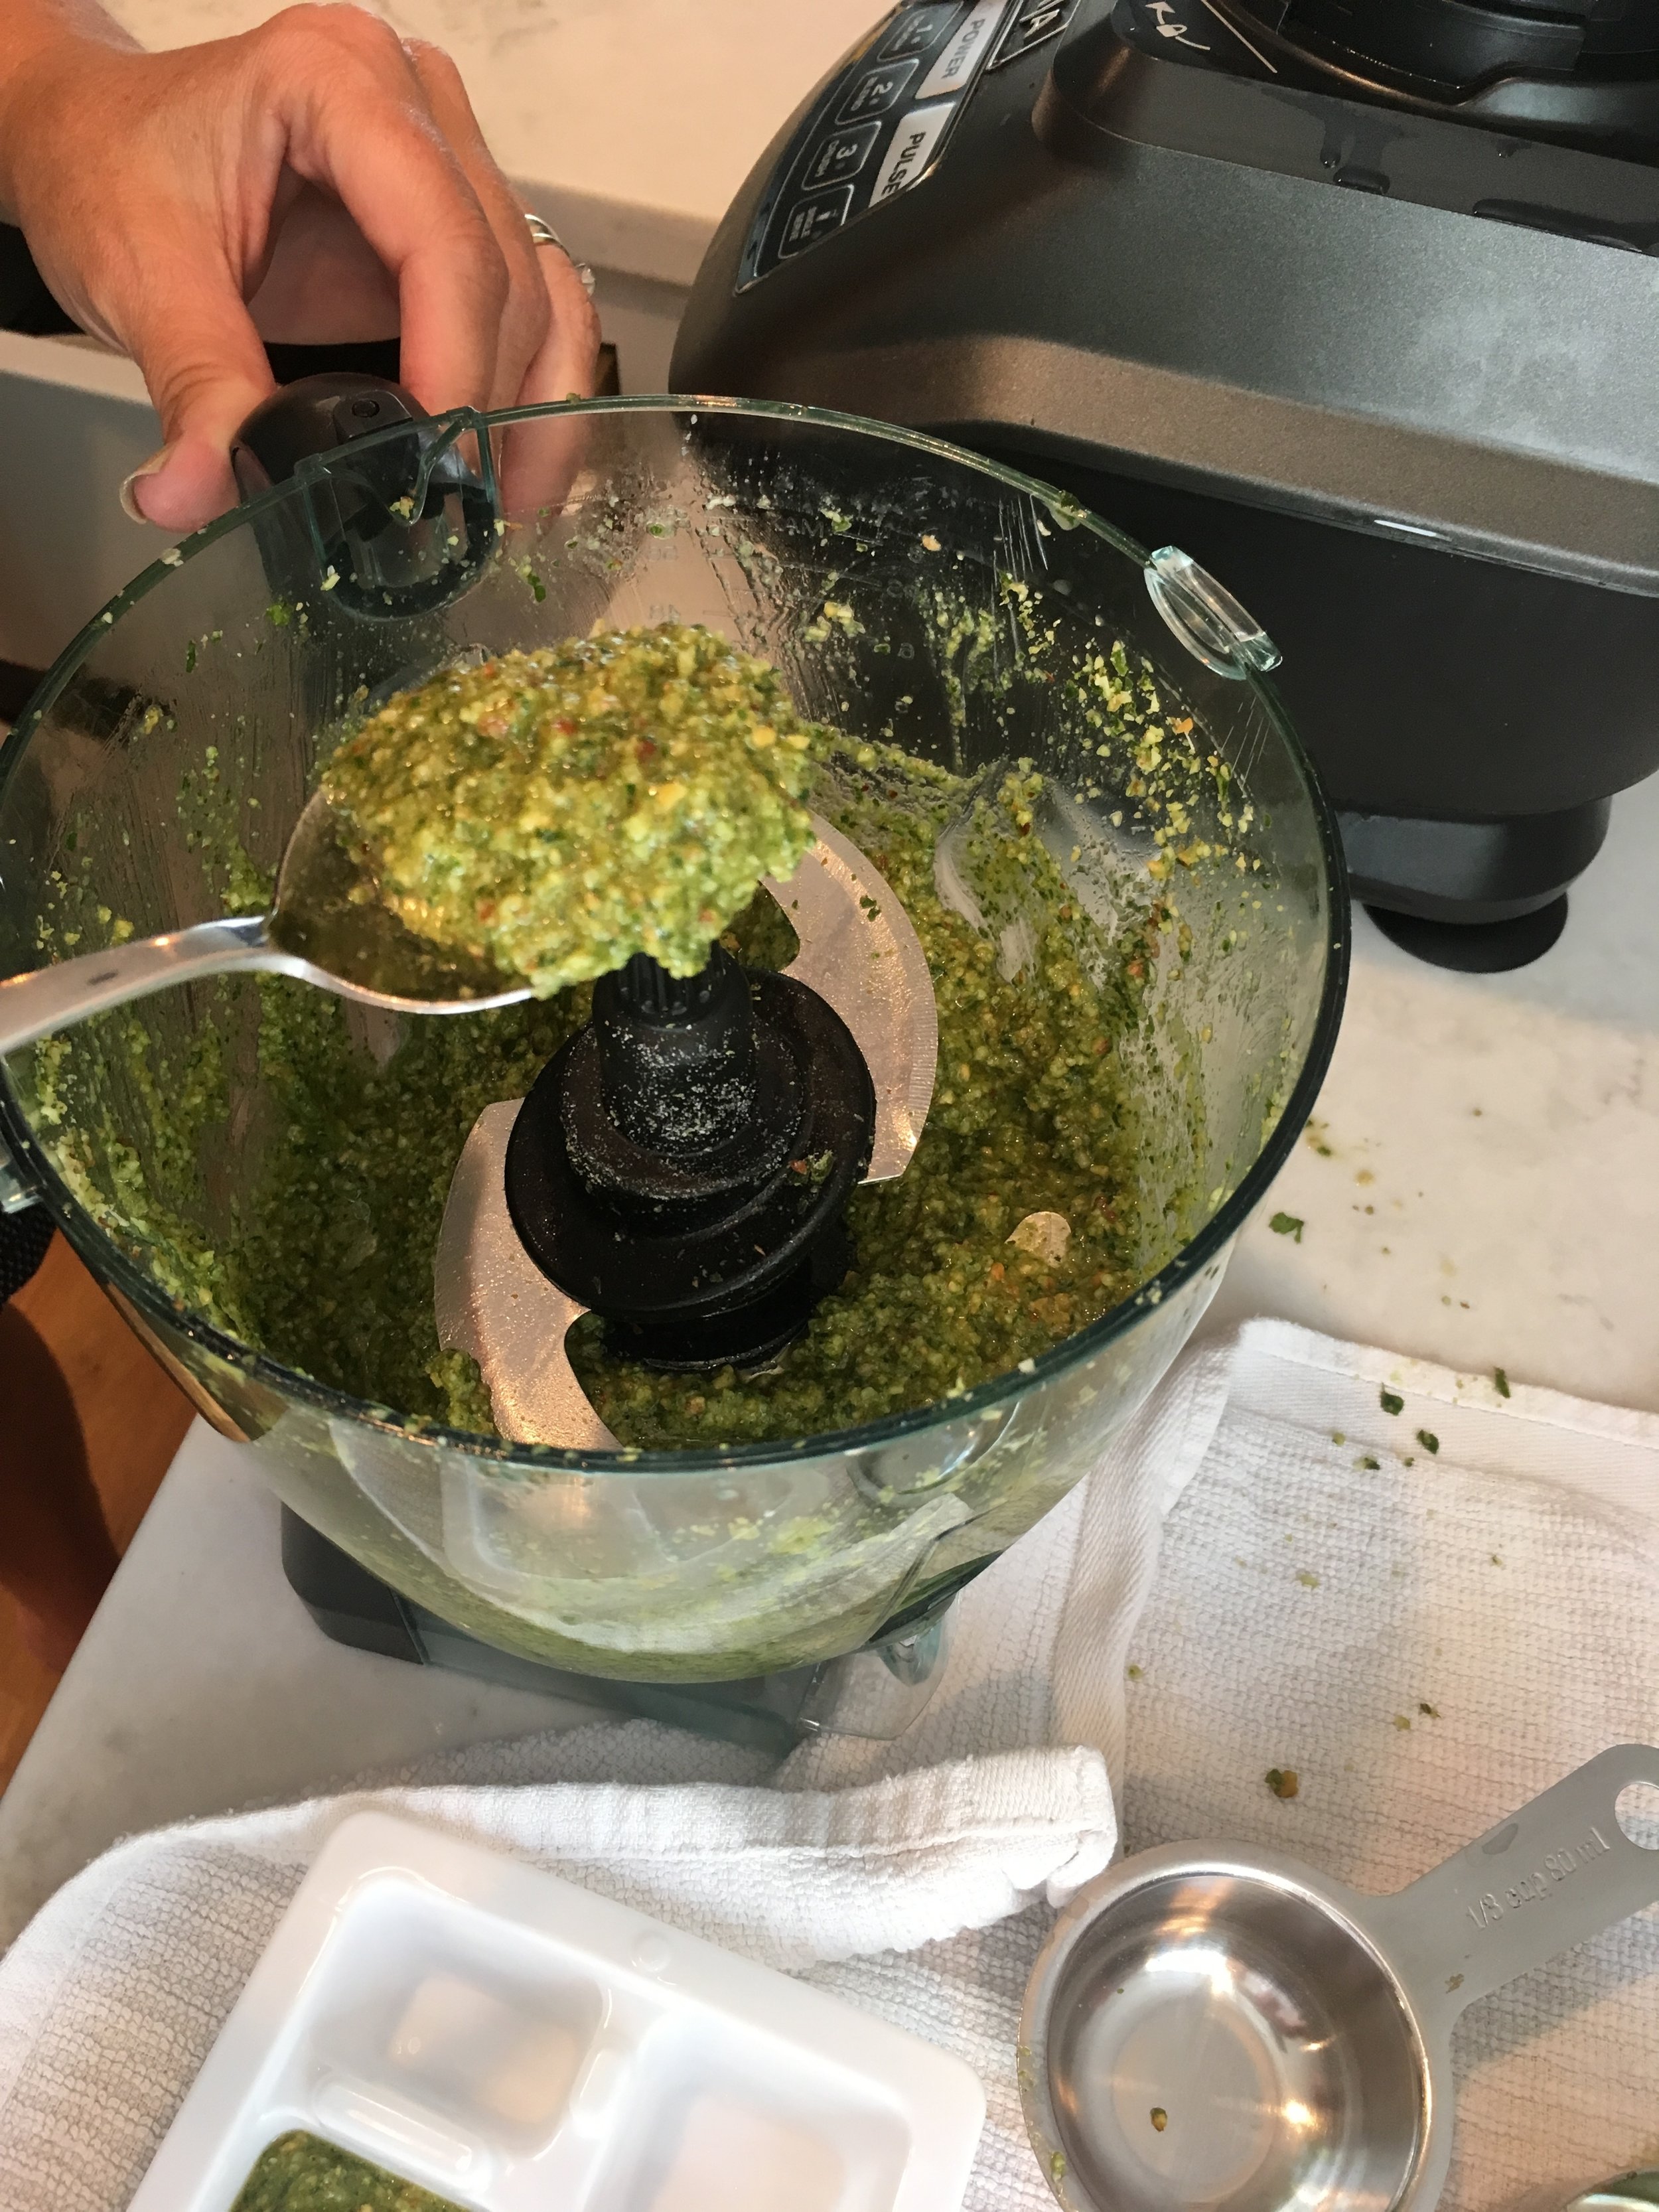
2. Add basil and pine nuts together in a food processor and pulse several times. Scrape down the sides.


3. Add garlic and cheese to the food processor and pulse several times. Scrape down the sides


4. If possible, stream the olive oil into the mixture slowly. If this is not possible, add olive a a little at a time and while scraping down the sides with each addition.


5. Add salt and pepper to taste.
6. Toss the mixture with cooked pasta as is or add the mixture to a skillet of warming heavy cream then mix with cooked pasta.
Long Term Storage:
Place the mixture in ice cube trays and freeze immediately.
Once frozen, remove from the trays and place all cubes in a Ziploc freezer storage bag.

Re-Heating:
Melt 2-3 T of butter in a skillet
Add small amounts of flour to create a roux.
Add heavy cream and allow to warm.
Stir gently to work the roux into the cream.
Add 4-6 cubes of frozen basil pesto.
Gently stir until the cubes are melted and incorporated.
Once incorporated, toss the mixture with cooked pasta.
Why Aren't We a Democracy?
I’ve been pretty quiet on social media lately and for good reason. There is so much bluster out there that it’s just white noise to me now. Besides, aside from a snarky come back zinger on some fool, there really isn’t much point. Everyone is tone deaf. That being said, it doesn’t stop me from reading, watching, and observing. I pretty much know where just about anyone stands based on what they ‘like’ anyway.
That being said, all of this reading, watching, and observing has left me grateful that we aren’t a true democracy with mob rule but rather a federal republic and constitutional representative democracy.
The Founding Fathers studied a lot and through their studies they were able to recognize and catalog various aspects and forms of government that worked and those that didn’t. The also knew their own history. The original colonists came to the New World seeking religious freedom and freedom from unjust persecution. The entire state of Pennsylvania was colonized by William Penn and a group of Quakers and it was also the reason why Puritans founded the ‘Pilgrim’ colony New Plymouth. A true democracy would have placed them back in the same fire if the winds changed enough.
So how do you prohibit that?
Well, you write the First Amendment and you form a federal republic and constitutional representative democracy. What you don’t do is form a true democracy.
Here’s a little exercise to show how a true democracy would work. Go to work tomorrow and ask ten co-workers to go to lunch. Then try and get all ten to agree on the same restaurant.
Here’s what’ll happen.
Half of the ten will be fine with whatever the first person suggests. They are the sheep. One, possibly two, will decline the invitation because they brought their own lunch but agree they would go to the restaurant. These are ones that vote ’present’. The remaining three or four will object to the chosen restaurant for a variety of reasons and attempt to get the previous five to change their votes. They are the dissenters.
Using the example above, 50% said ‘yes’ so they are now the mob. The mob wins and the other co-workers voices are discarded. This is a democracy.
Other examples of mob rule are the media and those idiots in Portland that call themselves ANTIFA. Frankly, I’m starting to wonder if there are any cops in that city.
Think about it.
The media decides what they want to cover even when they are given wide latitude and legal protections under the Constitution. The media is supposed to be fair and impartial and call balls and strikes. However, given the recent events with the beating of a gay conservative reporter covering an ANTIFA march/rally/protest in Portland, it’s obvious they’ve chosen a side and are actively ignoring unflattering news detrimental to their position. That is democracy and that is mob rule.
Self Sustaining Restaurants via Hydroponics
I went to my daughters dance competition a few weeks ago and came across some signage indicating that the resuratants and kiosks within the convention center were self sustaining. Well, to be direct it only applied to their vegetable and herb ingredients. I figured that since I dream of changing careers to do something with hydroponic farming, I’d go see what they were talking about.
Right there in the middle of this massive convention center, instead of reserving the square footage for meeting space, the partnership between the city and the convention center carved out a hydroponic farm. To advertise what they were doing and why, they had various explanatory boards along with some glassed off areas where you could see what the growing hydroponically under grow lights.
I thought it was a pretty cool concept so I thought I’d share the images I captured while I was there.


Dandelion Wine - It's That time of Year!
Ok, since my maple sap turned on me, I’m on to my latest endeavor… dandelion wine! I’ve never made it before and now that the Foreign & Domestic 5-part book series is complete, I find that I have a little more time on my hands… but not enough apparently to make maple syrup * sigh *. What’s the adage, idle hands are the devil’s work?

Image by Prolisok
I had a picture that I took some time ago when I originally contemplated this post and activity (2 years ago), but alas I can’t find it. I also did some research in the hopes of finding a good recipe with specific details. The four links I’m providing below will give you a good idea as to the different methods available as well as varying batch sizes.
Based on my reading and research though, the key to making a good dandelion wine is to remove the individual yellow dandelion petals from the bud. Don’t just pluck the bud from the stem and run with it. Apparently, the inclusion of the bud will make the wine bitter and unpalatable.
Good to know, right?
Good luck and happy hunting!
I’ll let you know how mine turns out… here are the links.